"No one's gay for Moleman..."
Date: Friday, January 11, 2013
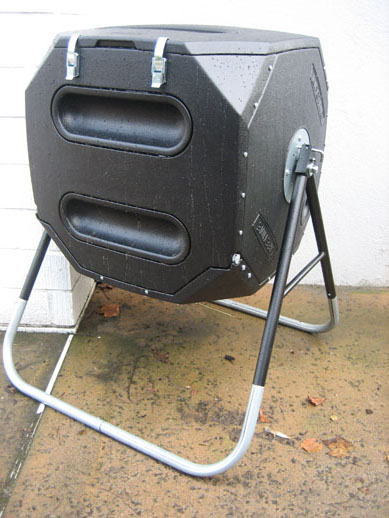
Already a month since my last entry and to be honest not much has happened. The plants are growing very slowly, like a cactus. On the plus side, I got a compost tumbler for Christmas which is either lame or awesome depending on your point of view.
At the cost of some up front effort, building the boxes and filling them with ideal soil has proven to be a huge time saver. Weeding and watering have been substantially reduced, and the soil is rich and loose. 2. The right plants
I did manage to plant things that are able to tolerate colder weather, which includes rainy days and frostbitten mornings. In fact, the contrast between warm and cool weather plants is quite apparent below.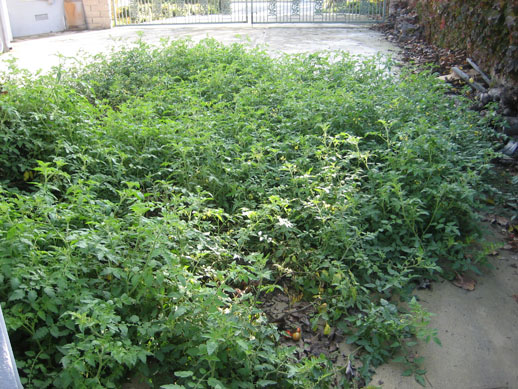
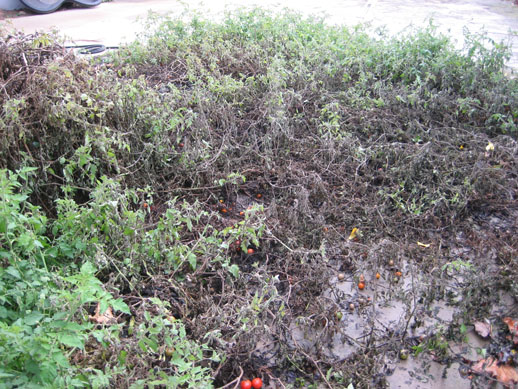
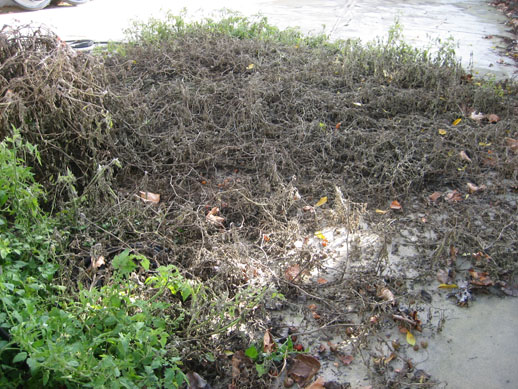
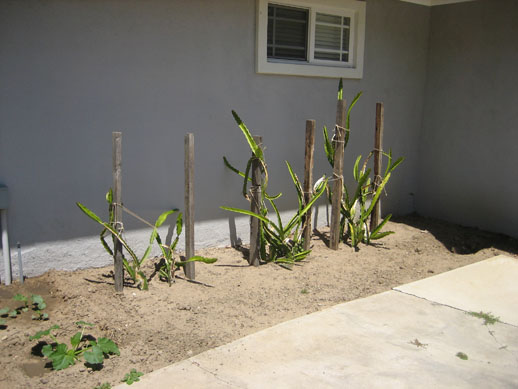
My once glorious tomato plants, a survivor of the summer season, reduced to a land of death by frostbite. The cold also kept it from producing very many fruits.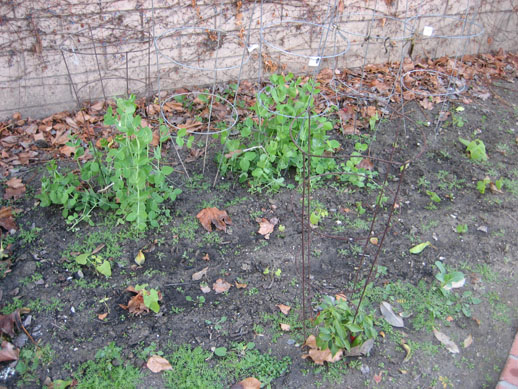
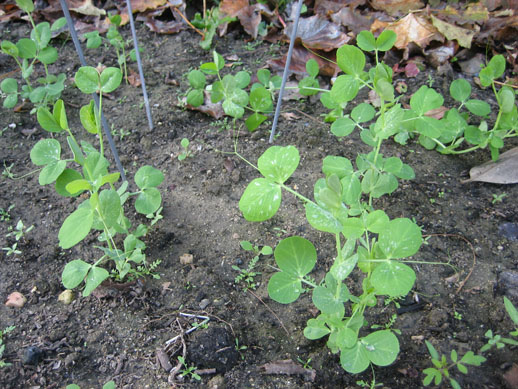
The vigor of peas (cool) versus beans (warm). I made a gamble that beans were hardy enough to survive winter. Where are the beans you ask? Exactly.
Somehow, I have managed to sprout the elusive celery seed. The process I used must have been a good one.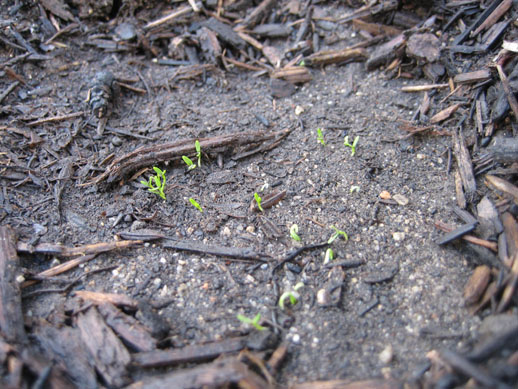
----------------------------------------------------
Unfortunately, there are quite a few things I should have done differently. Nothing that will spell doom for my plants, but it could have been a much better crop.
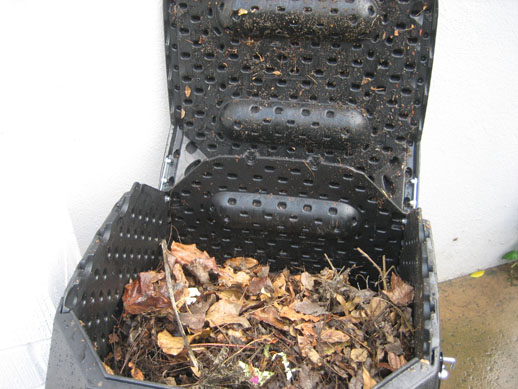
1. My homemade compost
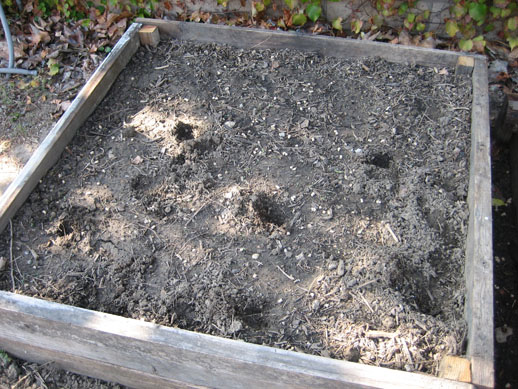
Or more accurately, the things that resided in said compost. Those little grubs I showcased in my last entry are responsible for the most annoying, frustrating, destructive forces ever to bear down on my garden. I have suffered several attacks thus far, not to mention various tunnels the worms themselves have been making.
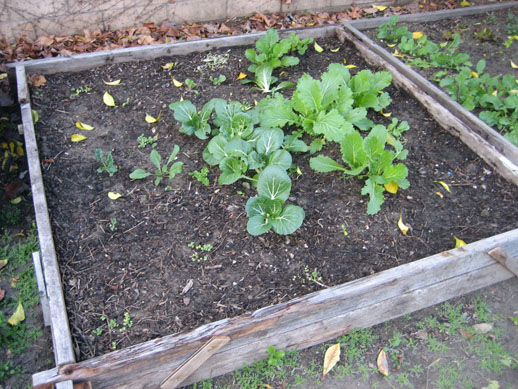
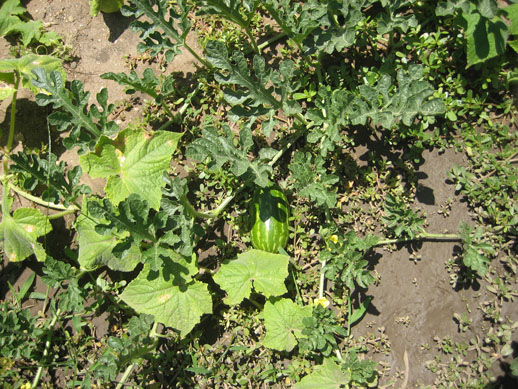
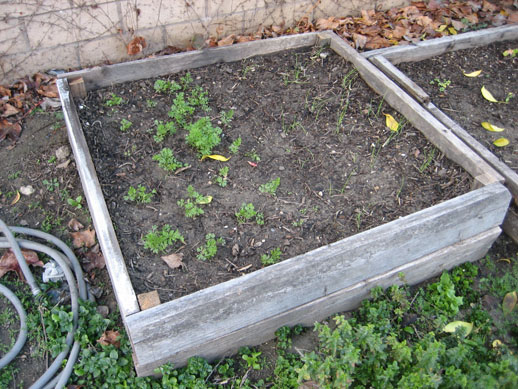
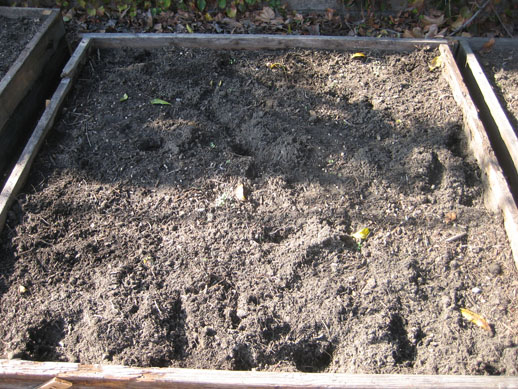
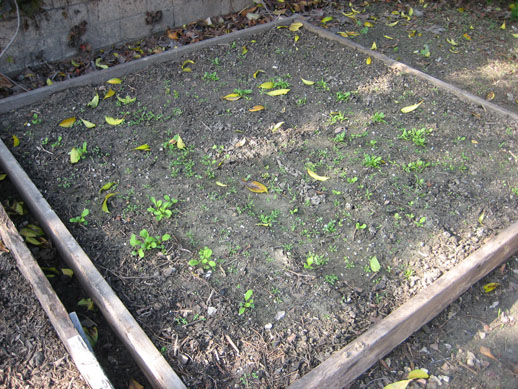
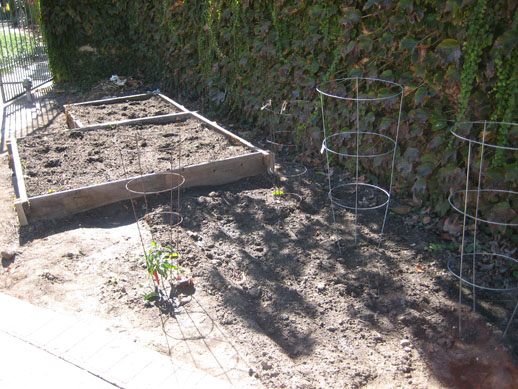
The pictures demonstrate how patchy some of my boxes are. Granted, this could have been improved by lack of animal attack and more care when planting, but the traditional method of rows is just so much more efficient in terms of time spent planting and number of seeds required. What I should have done was either stick to the traditional row approach, or used transplants. My method was somewhat a combination of the two, but ultimately they are best left as separate techniques.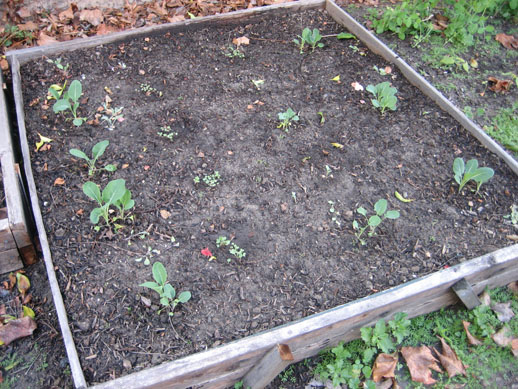
I am also finding the distance which I spaced the plants was also too conservative. Upon thinning out some of the sprouts, I noticed that cool weather plants have very long tap roots and few laterals. Tap roots are the main root that extends from the base stem of the plant. Laterals are all the roots that shoot horizontally. What this means is that all the soil in between each plant is not very well utilized. I could have made my spacing a little more cramped and still had healthy plants. 4. Weather
Lastly, the slow growth of the plants suggests to me that, while tolerant of winter weather, the plants actually enjoy environments more like early spring.
In all, not too bad for a first timer with these types of vegetables. I'm still learning and probably will be for a long time.----------------------------------------------------
At the cost of some up front effort, building the boxes and filling them with ideal soil has proven to be a huge time saver. Weeding and watering have been substantially reduced, and the soil is rich and loose. 2. The right plants
I did manage to plant things that are able to tolerate colder weather, which includes rainy days and frostbitten mornings. In fact, the contrast between warm and cool weather plants is quite apparent below.
My once glorious tomato plants, a survivor of the summer season, reduced to a land of death by frostbite. The cold also kept it from producing very many fruits.
The vigor of peas (cool) versus beans (warm). I made a gamble that beans were hardy enough to survive winter. Where are the beans you ask? Exactly.
Somehow, I have managed to sprout the elusive celery seed. The process I used must have been a good one.
Or more accurately, the things that resided in said compost. Those little grubs I showcased in my last entry are responsible for the most annoying, frustrating, destructive forces ever to bear down on my garden. I have suffered several attacks thus far, not to mention various tunnels the worms themselves have been making.
The pictures demonstrate how patchy some of my boxes are. Granted, this could have been improved by lack of animal attack and more care when planting, but the traditional method of rows is just so much more efficient in terms of time spent planting and number of seeds required. What I should have done was either stick to the traditional row approach, or used transplants. My method was somewhat a combination of the two, but ultimately they are best left as separate techniques.
I am also finding the distance which I spaced the plants was also too conservative. Upon thinning out some of the sprouts, I noticed that cool weather plants have very long tap roots and few laterals. Tap roots are the main root that extends from the base stem of the plant. Laterals are all the roots that shoot horizontally. What this means is that all the soil in between each plant is not very well utilized. I could have made my spacing a little more cramped and still had healthy plants. 4. Weather
Lastly, the slow growth of the plants suggests to me that, while tolerant of winter weather, the plants actually enjoy environments more like early spring.
In all, not too bad for a first timer with these types of vegetables. I'm still learning and probably will be for a long time.
Date: Wednesday, December 12, 2012
Four weeks into it my garden is already a fiasco. Part of my initial idea for this post was predictions of potential issues, but unfortunately the problems came to me first. I woke up on Thanksgiving Day only to find disaster.
Thanks.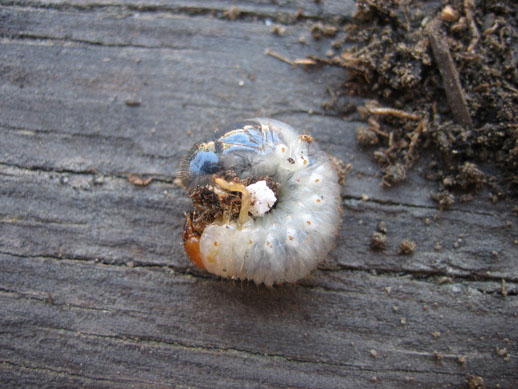

Box 1: iceberg lettuce, cabbage
Box 2: broccoverde, cauliflower, broccoli, brussels sprouts
Box 3: carrots, yellow onions
Box 4: kale, bok choy, nappa, celery
Box 5: arugula, salad bowl lettuce, spinach, cilantro, celery
Open Dirt: peas, snow peas, bush beans, soy beans
Peas, with a hint of frostbite.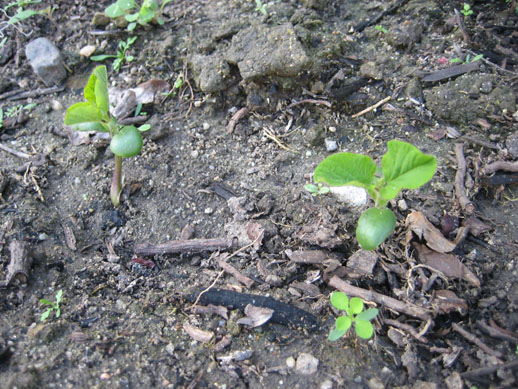
Soy Beans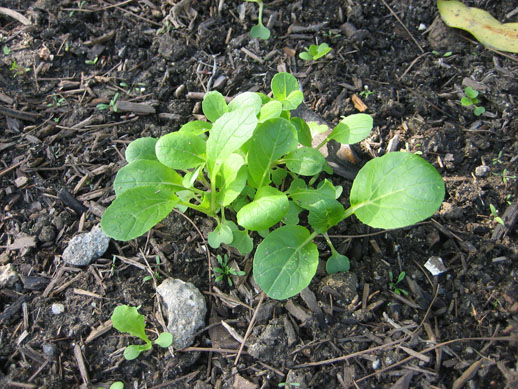
Bok Choy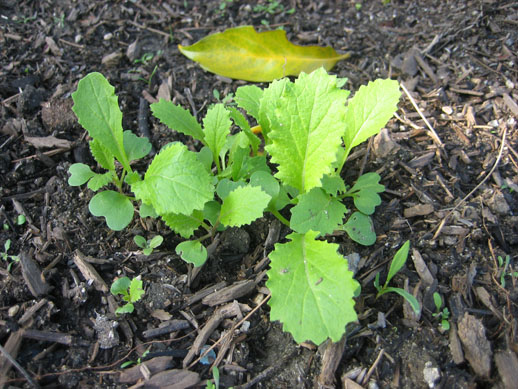
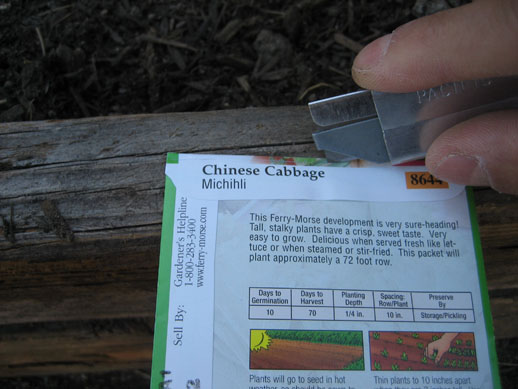
Nappa (Michihli)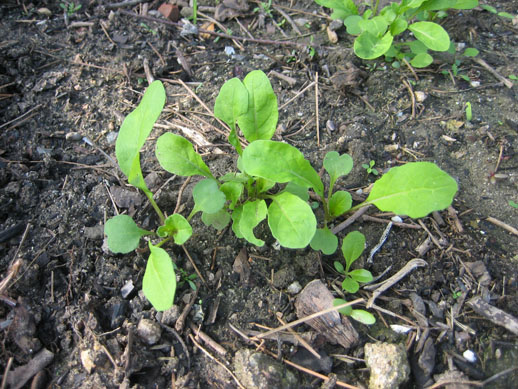
Arugula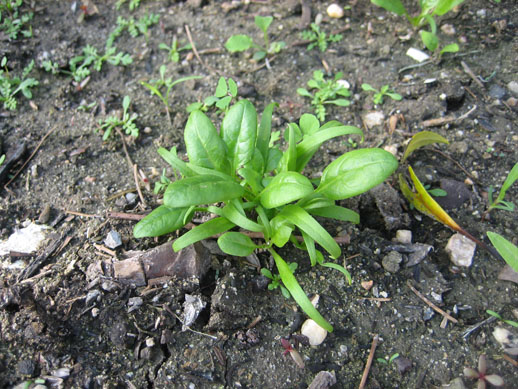
Spinach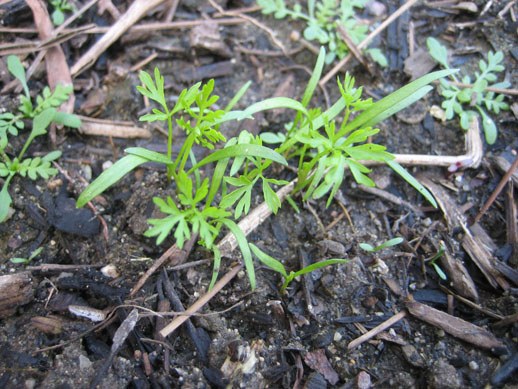
Carrots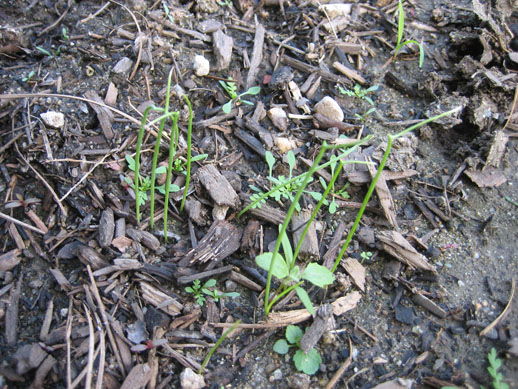
Onions
The differences between the plants will become more pronounced as time passes. The leaves develop their own shapes and shades of green, filling out to varying heights and widths. Over time it is more apparent why plant spacing is recommended as it is, and the once empty soil will soon be covered with the foliage of deliciously cultivated foraging food. Picking is a big part of the fun. Pulling out a carrot, harvesting kale, cutting heads of broccoli, they are all like opening a present, popping a soda can, or the start of a movie. There's a certain restrained, yet giddy excitement about it. I can't wait.
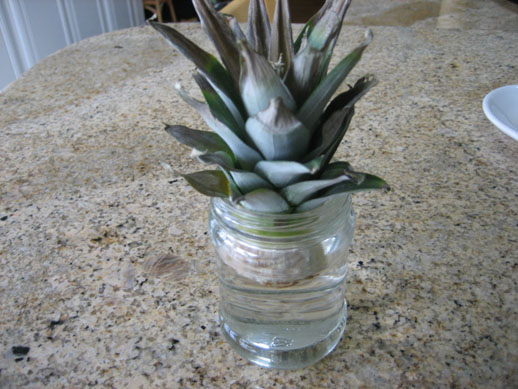
There is one plant I have doubts about, and that is celery. If I were to pick anything that would be completely unsuccessful it would be celery. It is an extremely difficult plant to germinate, with many gardeners only growing it for the sake of the challenge. Worse yet, it appears there is not much different in taste or nutrition between store bought and home grown stalks. Nonetheless, I will try anyway. I have taken extra steps with this plant which I have chronicled below.
Thanks.
Box 1: iceberg lettuce, cabbage
Box 2: broccoverde, cauliflower, broccoli, brussels sprouts
Box 3: carrots, yellow onions
Box 4: kale, bok choy, nappa, celery
Box 5: arugula, salad bowl lettuce, spinach, cilantro, celery
Open Dirt: peas, snow peas, bush beans, soy beans
Peas, with a hint of frostbite.
Soy Beans
Bok Choy
Nappa (Michihli)
Arugula
Spinach
Carrots
Onions
Date: Thursday, November 20, 2012

The topic for today is my foray into the winter growing season. Being in California, the term "winter" does not mean a whole lot, but temperatures are cooler and the days are much shorter which are optimal growing conditions for the plants I have in mind. I've mentioned before that most crops can be broken down into winter or summer varieties. In general, plants that produce some sort of fruit that can be separated from the main plant are summer varieties. These tend to be things like melons, squash, corn, beans, tomatoes, peppers, and so on. Part of the reason is that ample sunlight produces the sugars that makes the fruits taste so good. On the other hand are winter crops which tend to be plants which are themselves edible. Things like lettuce, carrots, cabbage, broccoli, herbs, and onions all prefer cooler weather, in part because excessive heat makes the plant itself taste bitter. As a rule of thumb, winter edibles are roots, leaves, or some part of the plant that doesn't contain seeds. Does this blow your mind? It did for me.
Keep in mind that what I am talking about excludes things like fruit trees, bushes, or any plant that survives longer than a season. Most crops I am growing are those that can be harvested for a period of time, then they either die or stop producing. Of course, things like trees have their own optimal seasons, but trees last forever, and require virtually no effort to get them to produce. Trees are boring.
Garden Design:
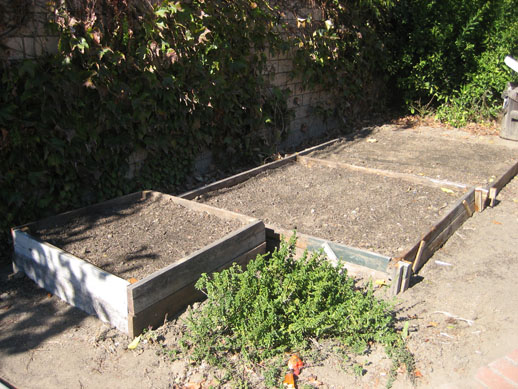
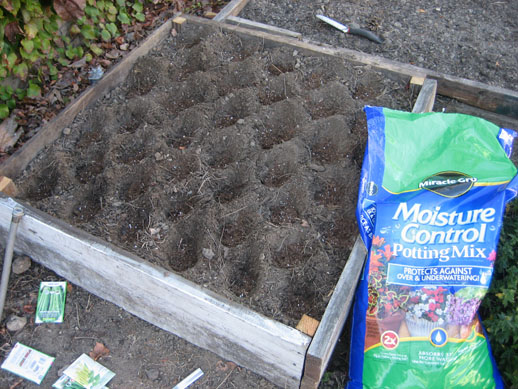
This is an interesting growing season for me because it contains a lot of firsts. In fact, most of what I am doing/growing is completely brand new. I've tried my best to research and set up the garden space to be as conducive as possible, but I would not be surprised to find a lot of failures as well. Traditionally, I've always had trouble growing winter type plants. This is probably due to growing them during the wrong season, growing them in poor soil, and not respecting proper spacing requirements. All these things I've tried to address with this new plot, and if this doesn't work, then I'm all out of ideas. I determined I was going to use planter boxes this time around. Planter boxes are nice for a number of reasons:
1. It elevates the soil grade so roots have more room to burrow, good for me since I have a hard clay layer about 5-8 inches below the topsoil.
2. Reduces water runoff since all soil is contained in the box.
3. Reduces weeding time by concentrating growing in a well defined space.
4. Any type of soil can be swapped into the box without fear of erosion or mixing with the existing soil.
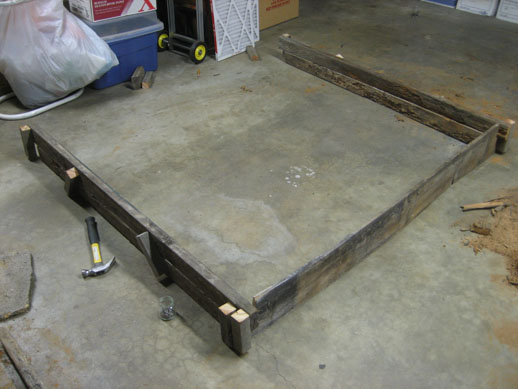
Planter boxes can be bought at any hardware store, but I decided to build mine out of old, rotting wood that has been sitting in my backyard for about a decade or more. This posed its own set of challenges including warped wood, degradation by termites, and general grossness to work with.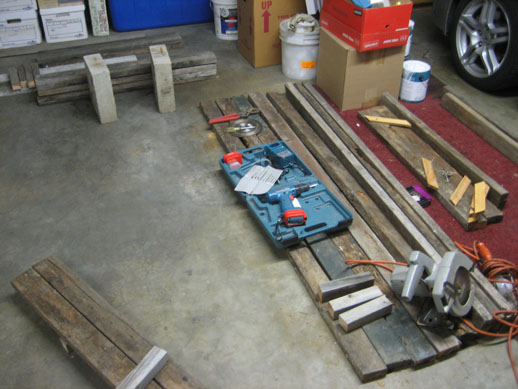
Until now I have always gone with the furrow approach, the method which creates those long lines of rows and trenches that are so symbolic of farmland. Recently I have been questioning whether this is the best approach for small scale gardening. There are three major flaws I've always encountered when using furrows.
1. The soil I have has fairly good drainage, which means water simply drains off the hill into the adjacent trenches. This leaves the mounds dry, which is especially bad for seeds in the germination phase.
2. Hills are easy to erode, especially when watered overhead, ie spraying everything with a garden hose. Overhead watering is never recommended, but setting up a drip system is quite a bit of work and may not be worth it.
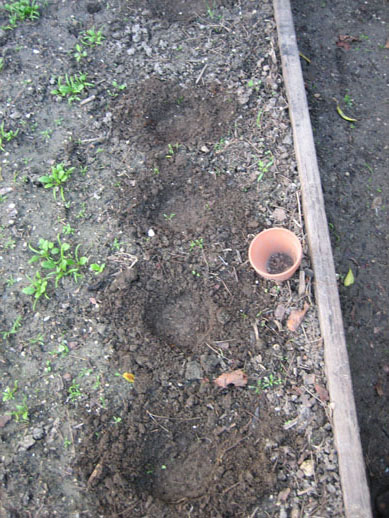
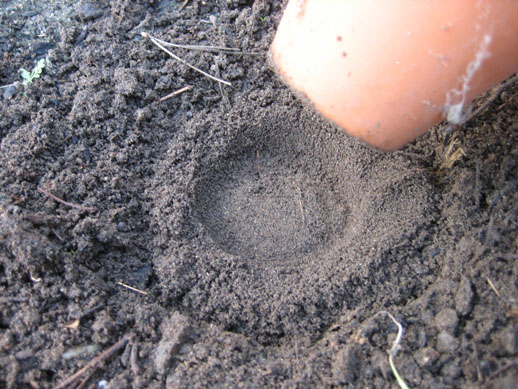
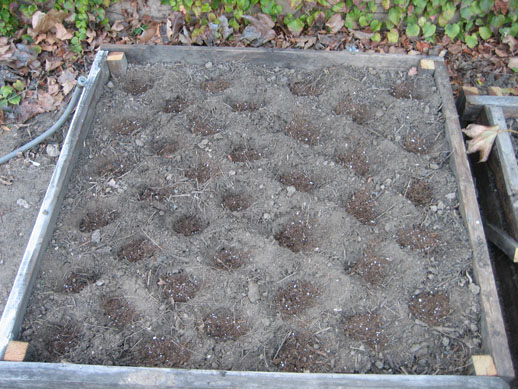
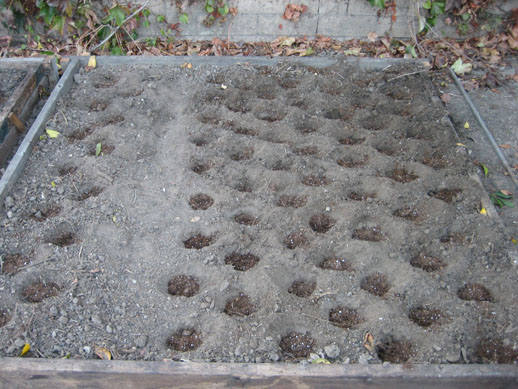
3. It is difficult to get proper plant spacing in rows. Seeds do not have a 100% germination rate, sometimes making the sprouts come up in patches. If this happens, the plant spacing is determined by wherever the plants have successfully sprouted. To combat these flaws I'm trying a new and sophisticated "hole" approach. In essence, I dig a shallow hole at the recommended thin spacing. Take some time to wrap your head around this revolutionary concept.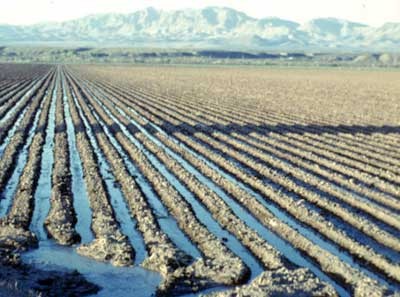
This is an interesting growing season for me because it contains a lot of firsts. In fact, most of what I am doing/growing is completely brand new. I've tried my best to research and set up the garden space to be as conducive as possible, but I would not be surprised to find a lot of failures as well. Traditionally, I've always had trouble growing winter type plants. This is probably due to growing them during the wrong season, growing them in poor soil, and not respecting proper spacing requirements. All these things I've tried to address with this new plot, and if this doesn't work, then I'm all out of ideas. I determined I was going to use planter boxes this time around. Planter boxes are nice for a number of reasons:
1. It elevates the soil grade so roots have more room to burrow, good for me since I have a hard clay layer about 5-8 inches below the topsoil.
2. Reduces water runoff since all soil is contained in the box.
3. Reduces weeding time by concentrating growing in a well defined space.
4. Any type of soil can be swapped into the box without fear of erosion or mixing with the existing soil.
Planter boxes can be bought at any hardware store, but I decided to build mine out of old, rotting wood that has been sitting in my backyard for about a decade or more. This posed its own set of challenges including warped wood, degradation by termites, and general grossness to work with.
Until now I have always gone with the furrow approach, the method which creates those long lines of rows and trenches that are so symbolic of farmland. Recently I have been questioning whether this is the best approach for small scale gardening. There are three major flaws I've always encountered when using furrows.
1. The soil I have has fairly good drainage, which means water simply drains off the hill into the adjacent trenches. This leaves the mounds dry, which is especially bad for seeds in the germination phase.
2. Hills are easy to erode, especially when watered overhead, ie spraying everything with a garden hose. Overhead watering is never recommended, but setting up a drip system is quite a bit of work and may not be worth it.
3. It is difficult to get proper plant spacing in rows. Seeds do not have a 100% germination rate, sometimes making the sprouts come up in patches. If this happens, the plant spacing is determined by wherever the plants have successfully sprouted. To combat these flaws I'm trying a new and sophisticated "hole" approach. In essence, I dig a shallow hole at the recommended thin spacing. Take some time to wrap your head around this revolutionary concept.
Date: Thursday, November 8, 2012
Here we are again. You just could not get enough, could you? Welcome back to my blog, this time about my exciting adventures in growing things. Tired of eating store-bought fruits and vegetables? Then let us take a journey in shedding societal dependencies and learn self sustaining habits. Want to grow that overpriced "organic" food yourself? Me too. I'm tired of eating plastic.
Here we are again. You just could not get enough, could you? Welcome back to my blog, this time about my exciting adventures in growing things. Tired of eating store-bought fruits and vegetables? Then let us take a journey in shedding societal dependencies and learn self sustaining habits. Want to grow that overpriced "organic" food yourself? Me too. I'm tired of eating plastic.

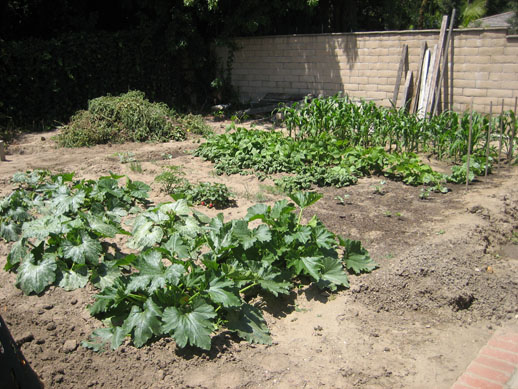
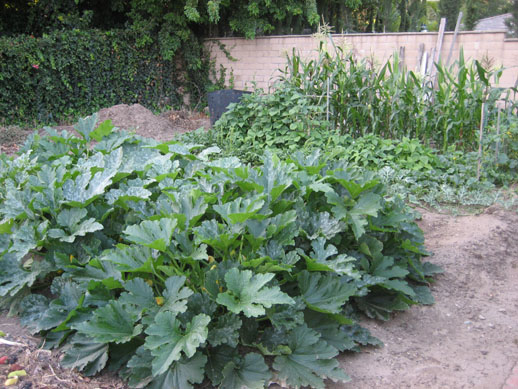
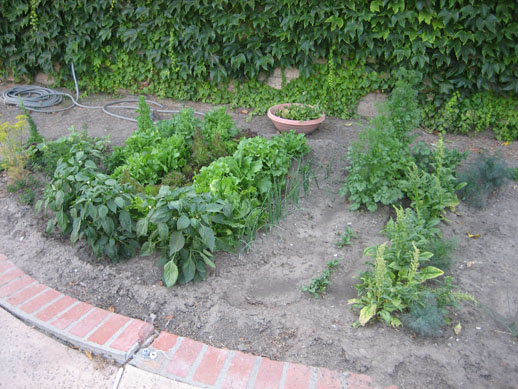
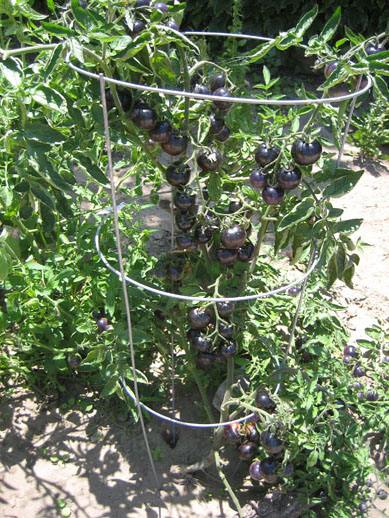
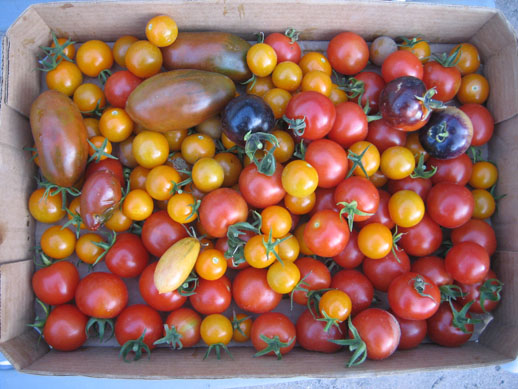
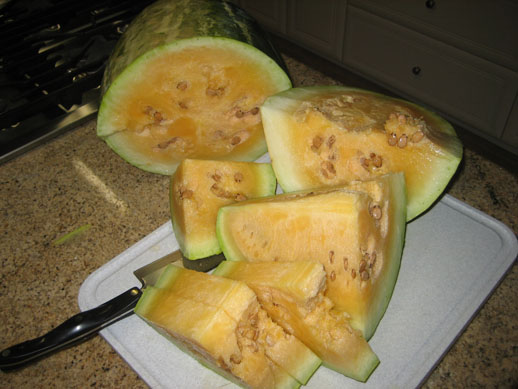
This latest subject matter is about my experiences in tending a garden. It is my most recent hobby and a topic with what I find an endless amount of fascinating material. It is hard to believe, but gardening is a serious amount of work. There is so much to learn about each individual plant, so much to do to work and cultivate the soil, and so much discipline required to consistently water and tend. But the payoffs can be well worth it. Something so simple, so primitive really, as the perfect skin of a sunsugar tomato or the waxy sheen of a freshly picked zucchini is extremely satisfying. Not to mention the superior flavor and texture versus a store bought equivalent. It's like having your cake... and eating it too!
The season is winter time, which means it is time to plant things more suitable to colder weather. I don't have any winter pics or progress yet, so in the meantime here are some snapshots of my crop this past summer. I am fairly new at this, thus much of the subjects I will be writing about will be about my own conjecture. I can't put much here other than my own limited experiences, but hopefully my statements are factually correct, and that someone reading this might learn a useful thing or two.